
Before we dive in to the actual development, we need to do some preparation work.
Step 1: Installation
Android setup
You will need to install Android Studio and the Android platform SDK on your machine. You can download the Android Studio here and follow these installation steps afterwards.
After installing the Android SDK, accept its licenses by running
sdkmanager --licenses. With a current command-line tools installation,sdkmanageris under$ANDROID_HOME/cmdline-tools/latest/bin.
ANDROID_HOME is the current variable for the Android SDK location. ANDROID_SDK_ROOT is deprecated; if an older tool still requires it, give both variables the same value.
- Add Android installation to your path:
Unix (macOS, linux)
export ANDROID_HOME="$HOME/Android/Sdk"
export PATH="$PATH:$ANDROID_HOME/cmdline-tools/latest/bin:$ANDROID_HOME/platform-tools"
On macOS, the default SDK location is usually
$HOME/Library/Android/sdk.
Windows
Using the Windows UI (search for “Edit environment variables for your account” in the Start Menu), set the ANDROID_HOME environment variable to %USERPROFILE%\AppData\Local\Android\Sdk, then append the following two entries to the user Path variable:
%ANDROID_HOME%\cmdline-tools\latest\bin
%ANDROID_HOME%\platform-toolsDo not use setx for updating Path — it truncates the stored value to 1024 characters, which can permanently destroy part of your existing Path.
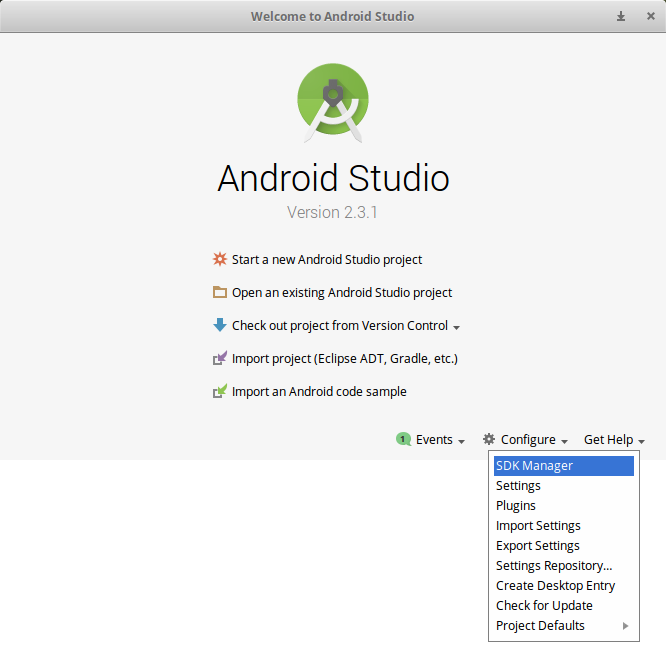
Start Android studio (check the executable in the folder that you installed it in). Next step is to install the individual SDKs:
Open the “Configure” menu at the bottom of the window:
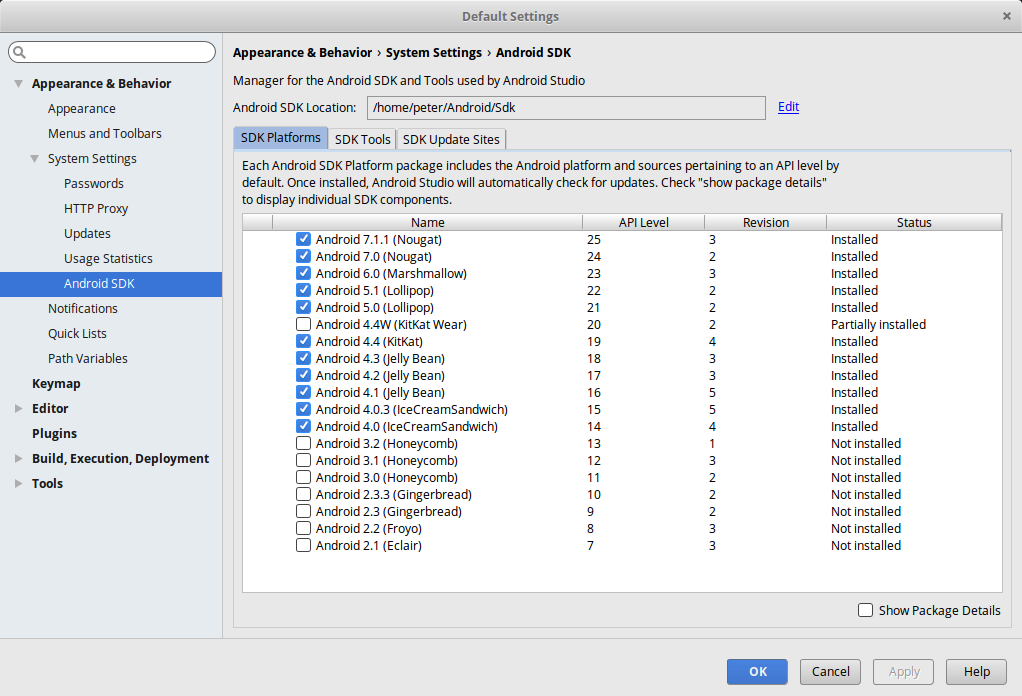
Select the desired SDKs and click on “Apply” to install the SDKs.
iOS setup
You will need a macOS with Xcode installed. After you’ve installed it, open Xcode in order to get the license prompt. Accept the license, then you can close it.
CocoaPods
If you haven’t installed CocoaPods, please install it by using the command: sudo gem install cocoapods. Otherwise, you may encounter errors during development or building, such as:
[warn] Skipping pod install because CocoaPods is not installed,
/path-to/your-project/src-capacitor/ios/App/Pods/Target Support Files/Pods-App/Pods-App.debug.xcconfig:1:1 unable to open configuration settings file
Step 2: Add Capacitor Quasar Mode
In order to develop/build a Mobile app, we need to add the Capacitor mode to our Quasar project. This will use the Capacitor CLI to generate a Capacitor project in /src-capacitor folder.
quasar mode add capacitor

# or, to skip the prompts (useful for scripts/CI):
quasar mode add capacitor --app-id org.capacitor.quasar.app --app-name "My App"
In a non-interactive environment (such as CI), where the prompts cannot be answered, the app id defaults to org.capacitor.quasar.app and the app display name to your package.json productName (or name), unless the --app-id / --app-name parameters are specified.
Step 3: Start Developing
To start a dev server with HMR, run the command below:
quasar dev -m capacitor -T [android|ios]Once the dev server is ready, your IDE will open (Android Studio or Xcode) and from there you can manually select the emulator (or multiple ones simultaneously!) and install the dev app on it/them. You can also run the dev app on a connected mobile/tablet device.
Do not accept Android Studio upgrade suggestions automatically. Keep Gradle, the Android Gradle Plugin, Java, and SDK versions within the requirements of the Capacitor major version used by the project. Consult Capacitor’s upgrade guide before changing the generated native toolchain.

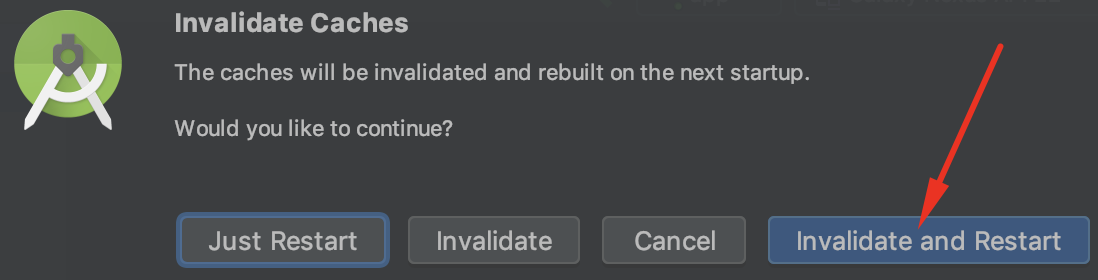
If you encounter any IDE errors then click on File > Invalidate caches and restart.