Developing
Start developing a Browser Extension with just one command.
$ quasar dev -m bex -T [chrome|firefox]

# ..or the longer form:
$ quasar dev --mode bex -T [chrome|firefox]You may or may not have already had a src-bex folder, but you will definitely have one now. Now that we’ve created a development environment, we need to load generated browser extension into your browser.
While you develop your BEX, you will notice that Quasar CLI builds the actual extension in the dist folder (normally in /dist/bex-chrome--dev/ or /dist/bex-firefox--dev based on the dev target in “quasar dev” command):
Chrome
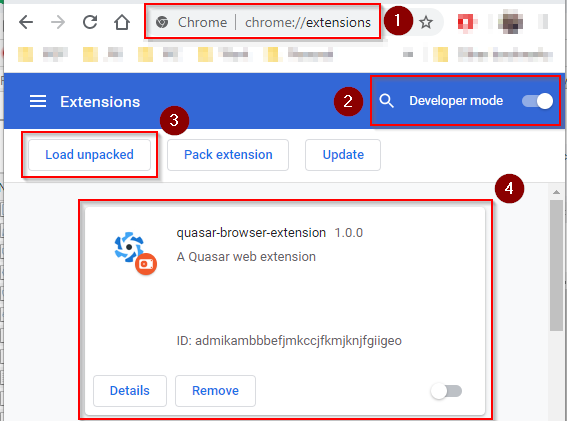
In line with the screenshot above, the following steps must be taken:
- In Chrome, navigate to
chrome://extensions - Toggle “Developer Mode”.
- Click “Load unpacked”. This will present you with the folder selection dialog. Navigate to and select your
/dist/bex-chrome--dev/folder. - You should now see your BEX mounted in Chrome.
More information about debugging Chrome Browser Extensions can be found in the official documentation.
Other Chromium Browsers
Although we haven’t tested all the various Chromium based browsers, BEX mode should be compatible with them. Please refer to the appropriate browser documentation on how to add a browser extension to that particular browser.
Firefox
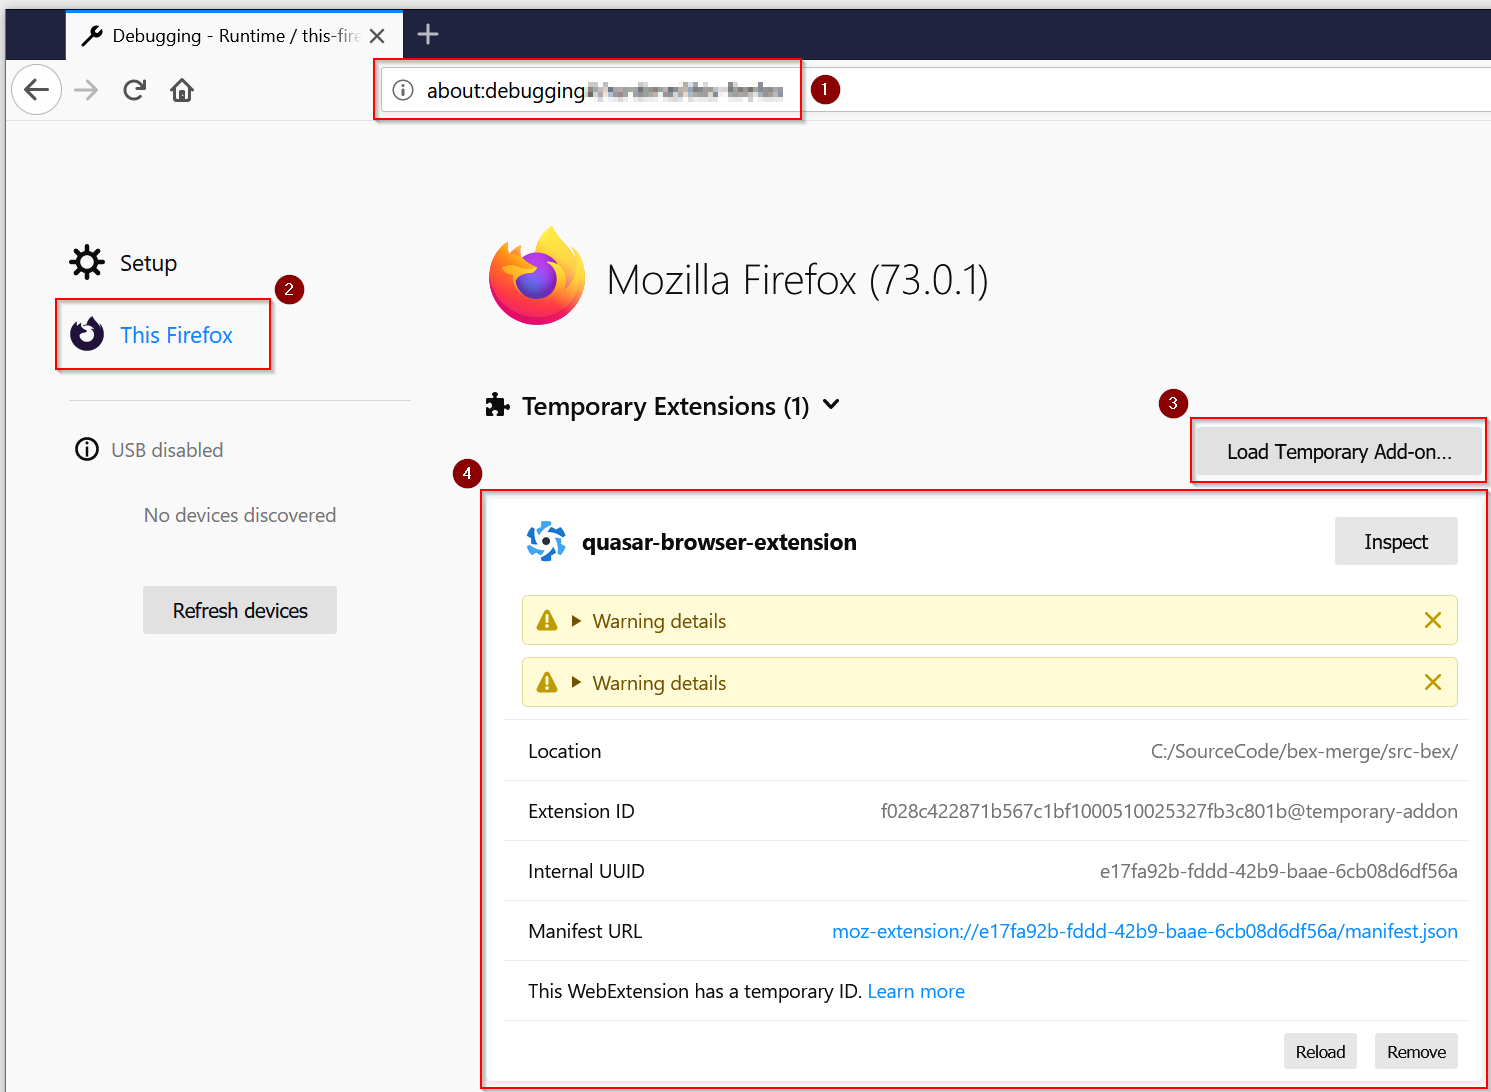
In line with the screenshot above, the following steps must be taken:
- In Firefox, navigate to
about:debugging - Click on “This Firefox”
- Click “Load Temporary Add-on…”. This will present you with the file selection dialog. Navigate to and select your
/dist/bex-firefox--dev/manifest.jsonfile. Note: Firefox requires the manifest file, not the/dist/bex-firefox--devfolder like Chromium browsers. - You should now see your BEX mounted in Firefox.
More information about debugging Firefox temporary addons can be found in the Firefox Extension Workshop.
Hot Module Reloading (HMR)
The best developer experience that you will have is with Chrome. We’ve managed to make HMR fully work for it:
- Full HMR for devtools/options/popup page
- When changing the background script, the extension will automatically reload.
- When changing a content script, the extension will automatically reload & the tabs using those content scripts will auto-refresh.
- The popup/page will not need to be compiled in its entirety. Instead, you will be able to benefit from on-the-fly compilation only for the browser requested files, which is VERY fast.
On the other hand, we cannot offer the same experience for Firefox too. However, Firefox watches for file changes and tries to auto-reload the extension on changes, but none of the HMR features above (specified for Chrome) will work.
Debugging
Browser extensions runs in three different environments (more on upcoming pages) and it requires various environments for debugging.
With Chrome
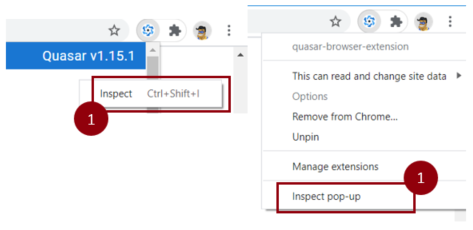
You can find following places to investigate the errors and outputs from the console in DevTools:
- Popup - right click on the page or on the extension icon and choose
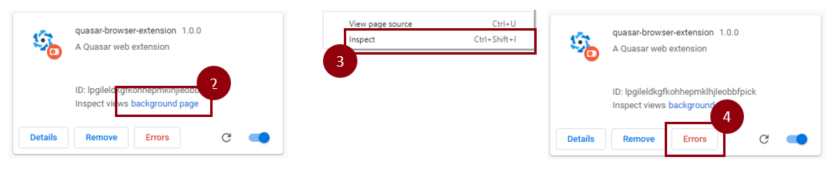
Inspect popupfor DevTools. - Background scripts (e.g.: background-hooks.js) - open DevTools from
Manage extensions - background page. - Content scripts - page where your script is injected.
- Extension Errors - list of errors related to the extension (e.g. manifest configuration) are available in
Manage extension - Errors.
If your code changes are not propagated to the browser you can try to: - Update or Reload extension - from the Extensions list (screenshots) - Restart browser - Restart dev process
For more information, please visit Debugging extensions.
Building for Production
$ quasar build -m bex -T [chrome|firefox]

# ..or the longer form:
$ quasar build --mode bex -T [chrome|firefox]You will be instructed which is the output folder. Normally, it’s /dist/bex-chrome/ and /dist/bex-firefox, based on the target specified for the “quasar build” command.
TIP
If you want to test out the your-project-name.zip file, you can do this by dragging the file into the same place you load the Extension in development mode; for Chrome chrome://extensions and Firefox about:debugging. See the development screenshots above for more information.
A Note on Minification
Part of the review process for Browser Extensions in both Chrome and Firefox must allow the relative teams to examine the code being deployed as a live extension. With this in mind, minified code is not allowed. So, to allow for the review process, Quasar will not obfuscate and minify the built code for Browser Extensions.
Given any extension will be ran directly on the user’s computer, upload speed isn’t a factor to worry about here, so minifying the code isn’t necessary.
Publishing to the Stores
Since Quasar removes the burden of building and packaging your Browser Extension, once you are finished developing your extension, it is ready to be published. The publishing process differs between browsers, but the official documentation will guide you through the process.
Chrome - Publishing a Chrome Browser Extension
Firefox - Publishing a Firefox Add On (Browser Extension)
TIP
BEX mode should be compatible with all chromium based browsers. Please refer to their relative documentation on publishing extensions.