Before we dive into the actual development, we need to do some preparation work.
Step 1: Installation
The first step is to make sure you got the Cordova CLI installed and the necessary SDKs.
$ npm install -g cordovaWARNING
Depending on your version of Android Studio, you might need to re-enable the “Android SDK Tools”. You can do this by going to “Tools > SDK Manager > SDK Tools” then un-ticking “Hide Obsolete Packages” and ticking “Android SDK Tools (Obsolete)”. The instructions below assume this has been done.
WARNING
The environmental variable ANDROID_HOME has been deprecated and replaced with ANDROID_SDK_ROOT. Depending on your version of Android Studio you may need one or the other. It doesn’t hurt to have both set.
Android Setup
After this step you will need to install the Android platform SDK on your machine. You can download the Android Studio here and follow these installation steps afterward.
Make sure that after you install the Android SDK you then accept its licenses. Open the terminal and go to the folder where the SDK was installed, in tools/bin, and call
sdkmanager --licenses.Add Android installation to your path:
Unix (macOS, Linux)
export ANDROID_HOME="$HOME/Android/Sdk"
export ANDROID_SDK_ROOT="$HOME/Android/Sdk"
export PATH=$PATH:$ANDROID_SDK_ROOT/tools; PATH=$PATH:$ANDROID_SDK_ROOT/platform-toolsPlease note that sometimes the
/Android/Sdkfolder is added inside/Library/inside your user folder. Check your user folder and if the/Android/folder is only inside/Library/do:export ANDROID_SDK_ROOT="$HOME/Library/Android/Sdk"orexport ANDROID_HOME="$HOME/Library/Android/Sdk"instead.
Windows
After installing Android Studio, you need to install two more pieces of software:
- JDK from Oracle. It can be found here
- Gradle. It used to be usable from Android Studio but now you have to install it separately. There is a particular version that Cordova requires. You can download it here
Then you will have to set environment variables. You will need to set the following variables. Cordova has a good guide for it already. It can be found here. You need to:
- add
ANDROID_SDK_ROOT. It can safely be set to: “%USERPROFILE%\AppData\Local\Android\Sdk” - add two
ANDROID_SDK_ROOTdirectories to your path: %ANDROID_SDK_ROOT%\tools;%ANDROID_SDK_ROOT%\platform-tools - add Gradle to your path. Note that Gradle does not have an installer. You just put the binary files where you want them, then add the bin directory to your path.
- add
JAVA_HOME. Its value depends on where you installed it. You can download the JDK here
You can check the value of an environment variable by typing in console
echo %ENVIRONMENT_VARIABLE%.
If you have an init script for your command prompt or powershell, you can try this:
setx ANDROID_HOME "%USERPROFILE%\AppData\Local\Android\Sdk"
setx ANDROID_SDK_ROOT "%USERPROFILE%\AppData\Local\Android\Sdk"
setx path "%path%;%ANDROID_SDK_ROOT%\tools;%ANDROID_SDK_ROOT%\platform-tools;<gradle_path>\bin;"After the tools are installed, set up Android Studio with the correct SDK and create a virtual machine.
Start Android Studio (check the executable in the folder that you installed it in). The next step is to install the individual SDKs:
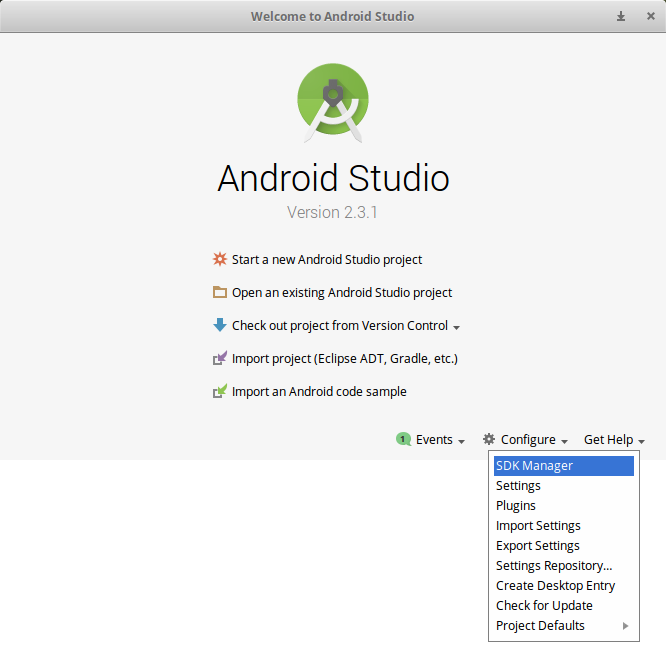
Open the “Configure” menu at the bottom of the window:

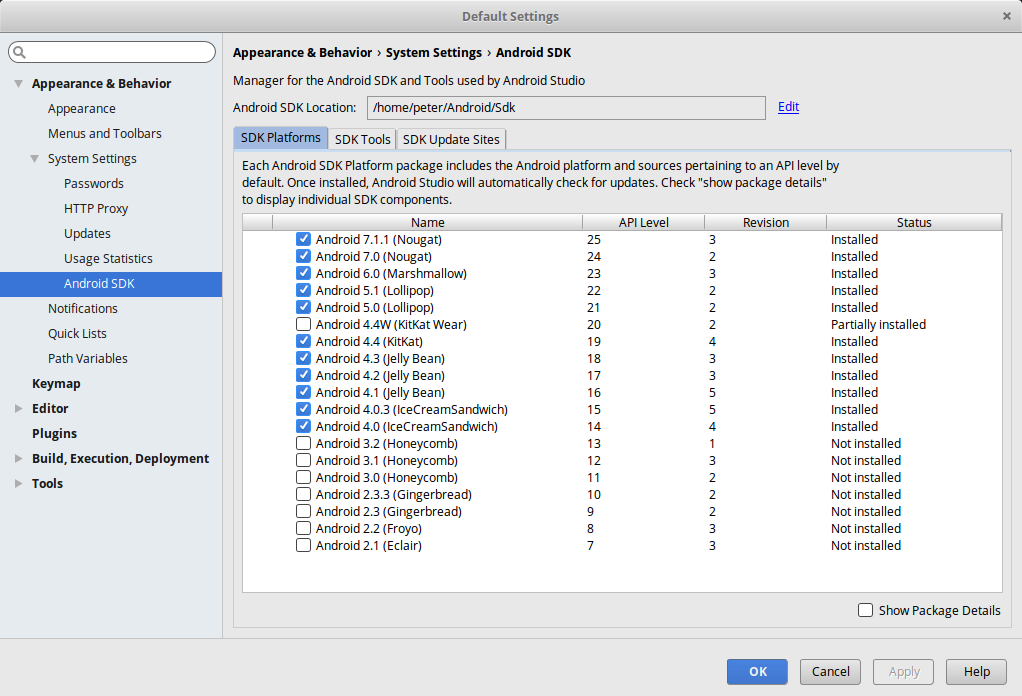
Select the desired SDKs. As of December 2019, Cordova requires android-28 (Android 9.0 - Pie) so be sure to include it. Click on “Apply” to install the SDKs.

iOS Setup
You will need a macOS with Xcode installed. After you’ve installed it, open Xcode in order to get the license prompt. Accept the license, then you can close it.
Step 2: Add Cordova Quasar Mode
In order to develop/build a Mobile app, we need to add the Cordova mode to our Quasar project. What this does is that it uses Cordova CLI to generate a Cordova project in the /src-cordova folder. The /src-cordova/www folder will be overwritten each time you build.
$ quasar mode add cordovaStep 3: Add Platform
To switch to the Cordova project, type:
$ cd src-cordovaTarget platforms get installed on demand by Quasar CLI. However, if you want to add a platform manually, type:
$ cordova platform add [android|ios]To verify that everything is in order, type:
$ cordova requirementsOn some newer Debian-based operating systems you might face a very persistent problem when running
cordova requirements. Please see the “Android SDK not found” after installation section for assistance.
Switching to iOS WkWebView
Switching to WKWebView is highly recommended (but optional!) as UIWebView has been deprecated in iOS 12.0 as described in this Cordova blog post: https://cordova.apache.org/news/2018/08/01/future-cordova-ios-webview.html.
However, choose wisely if you want to replace the default Web View. Each comes with its own caveats. Make sure that you visit the link above.
Option 1: Ionic Webview Plugin
- Install Ionic Webview Plugin
# from /src-cordova
$ cordova plugin add cordova-plugin-ionic-webview- Add
ScrollEnabledpreference toConfig.xml
<platform name="ios">
  <preference name="ScrollEnabled" value="true" />
</platform>- Consult Ionic Docs for caveats on WkWebViewPlugin
- https://beta.ionicframework.com/docs/building/webview
- https://github.com/ionic-team/cordova-plugin-ionic-webview
Option 2: Cordova WkWebviewEngine Plugin
- Install Cordova WkWebviewEngine Plugin
# from /src-cordova
$ cordova plugin add cordova-plugin-wkwebview-engine- For caveats and more info, visit: https://github.com/apache/cordova-plugin-wkwebview-engine
Step 4: Start Developing
You can start the development server with the command below:
$ quasar dev -m cordova -T [android|ios]

# passing extra parameters and/or options to
# underlying "cordova" executable:
$ quasar dev -m ios -- some params --and options --here
# when on Windows and using PowerShell:
$ quasar dev -m ios '--' some params --and options --hereThis will also add Cordova mode and install the related Cordova platform automatically if it is missing.
You will be able to run the app on your mobile device if you have one, or through the emulator. See Mobile App Build Commands > Developing for more information.
WARNING
In Android Studio, you will be greeted with a message recommending to upgrade the Gradle version. DO NOT UPGRADE GRADLE as it will break the Cordova project. The same goes for any other requested upgrades.

If you encounter any IDE errors then click on File > Invalidate caches and restart.
